Monday, March 16, 2009

Happy 5th Birthday Ian!

As mentioned in my previous post, I volunteered to make a dino cake after watching a video on how to make it at howdini.com. Now, this is the real deal. Ian's mummy saw the try-out i did, the green chubby one and showed Ian to see if he likes it. Just when i thought maybe i should make it in his favorite colour, Ian's mummy told me he wanted it in his fav colour, purple. hmm..now..isn't that barney? *shrugs* haha. He added, "the neck's too short, can it be made longer?" a little puzzled at what he meant, i went to re-look at my picture and kinda burst out laughing to myself. See the comparison of the try-out dino (green) Vs the real deal. Having gained pretty disasterous experiences from making the green dino, i tried my best to avoid the same mistakes. But still, i was working a little too slow, and couldn't manage to smooth the frosting perfectly. I've learnt to accept cake imperfections as I've found out that, the more i try to make it good, the more unexpected accidents happen. i.e. i frosted the tail perfectly and when i move on to frost the legs, my hand somehow twitched and knocked the tail. *cries and wails*

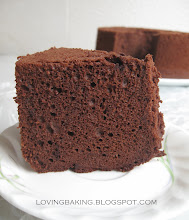
The try-out was done using 6" cakes while the real one was done using 8" cakes. The "bigger" cake area probably made it a teeny weeny bit easier to frost too. After watching the video upteen times and looking at my horrible overweight green dino (which has a non-existent neck and chubby fat tail) I modified the original templates in such a way that it'd fit look like a nice dino in the end. The cake comprises of 2 layers of velvety chocolate cake (which was a great choice cos the guests loved the taste) sandwiched with strawberries and mango (i know it's a weird combi but there's another story to how it arrived at strawberries and mango) and covered in white chocolate swiss meringue buttercream coloured purple of course. I'm pretty happy with the swiss meringue buttercream as D commented that it's less over-buttery like the italian meringue buttercream, and not as sweet! =DD
Blaming on my poor time management, i didn't manage to look for the big choc buttons and hence used mini oreos to replace them. The medium sized spots were normal m&ms and the small sized spots were mini m&ms. The spikes of course, were hershey's kisses. =p Coming to the eyes, a slight discussion with my sister on her opinion as the green one looked..hmm..scary? We finally decided on using the mini m&ms placed close to each other. As for the mouth, a slight debate on whether to make it a cute smiley one, or *roar* fiercer dino. We decided on a cute small mouth to minimize the potential mistakes that could happen while trying to position the spikey teeth =p I myself gave the reason that, we wouldn't want Ian to be a fierce boy rite? =X oh! and the toes! they were studded with 3 normal m&ms =)
As i didn't have time to go down to IMM to get a bigger cake board and the largest in phoon huat and sun lik is 16" x 16", i just had to settle with that. This explains why the cake is at in angle =p Well, i'm glad it was so, if not, it wouldnt be able to fit in my fridge haha! the top area seemed bare, so i decided to cut out some fondant letters spelling "Happy Birthday Ian" and of course, topped the cute smiley dino with a fondant party hat =) Sadly, I don't have pictures of the innards of the cake but the frosting thickness this time was good! not too thick nor thin about o.7cm thick? =)
I was still pretty worried about the cake thinking it could have been better. But after compring my trial version and the real deal, i guess it wasn't so bad after all huh..More importantly, I hope Ian liked the cake. =)

Friday, March 13, 2009

mad about bread

Why make bread when its so readily available and pretty cheap and affordable? I guess for many, they find it therapeutic when they knead the bread and etc. Well, this reminds me of how i embarked on my bread-making journey sometime last year and how i met with many many failures. Not that i'm all good and super now, i'm still pretty unsure if im the right track, but i can feel it improving =p

I don't think i shall tell the long story about how and what failures i met along the way. to summarise it all, i started out with aunty yochana's recipe, using a hand-held mixer with the spiral attachement (for making bread dough). disaster. i dun think i'd ever go back to using that again. i then turned to my only hope (then) - my pair of hands. Painstakingly tried to learn how to knead bread and figured that i would save on a bread machine if i mastered kneading the bread. i'm not too sure if i "succeeded", but things got better. I got tired of the mess i have to clean up after kneading and succumbed to buying a bread machine. the reviews from other bloggers and their experiences using it, which program/function is the best etc PLUS the price, made it all too attractive NOT to buy it. So, i got a bread machine. now, sometime later, i got myself a kitchenaid. it seems as though now, i wouldn't need my bread maker anymore. zzz

I'm really noob at bread making, and still in the process of learning and identifying the different stages and texture and feel of the dough etc. I would liken bread making to an art. Well, it definitely taught me patience, precision and good time management and planning. Yeasts waits for no man. It's unlike certain dough (cookie dough) where you can leave it in the fridge and bake it some days later. you HAVE to bake your bread dough once it's done with it's second proof.

to save you from my ramblings, i shall move on with my "experiments" for the day. Made this milk loaf when i saw rave reviews about how soft and cottony this bread is. It's actually my second attempt on this bread and it's finally a SQUARE! However, I was so concerned whether or not it could reach the top of the tin and fill up into a square that i actually forgot to preheat the oven. As a result, the poor dough was almost bursting out of the tin and develop a "tumour" at the sides. Needless to say, the dough overproofed and as a result, lacked a little in the flavour. Nonetheless, the bread was really really soft and cottony and lived up to its reviews. At least my mum had something nice to say about this =p

Next up, some roti boy! I've no idea why i'm so determined to succeed in making this roti boy. probably because i once was a little crazy over it and used to buy it whenver i was in sengkang for piano lessons. (which probably explained my exponential weight gain)

I've tried this recipe for at least 3 or 4 times and i would say i'm pretty satisfied with the results this time! Here, i'm using the sponge and bread dough method which make the bread unusally soft and has an amazing ability for the bread to stay soft up to 2 days! (cited from jo's deli) I can't verify that fact as yet, but the bun was really really soft and nice.

I had one that was really fresh out of the oven (but cooled of course) and one that was left out for 5 hours or so. The one that was fresh had a nice, crispy fragrant coffee crust which gave way into a soft, pillowy bread which burst with buttery goodness. However, when left out, the coffee topping became soft but still, the bread was soft and buttery. my previous attempts always yielded buns that weren't as soft as this (still edible) and for some odd reason, the topping always seemed to be "sticky" after leaving it out for a while. This time, all went well =D yippee!

However, improvements are to be made and i have no idea how to see if i've over-kneaded the dough/over-proofed it (though i know it deflates at the slightest touch)/why does the bread douhg keep shrinking while rolling it?

Any bread masters out there? any help/ comments would be greatly greatly appreciated!

Tuesday, March 10, 2009

dino cake!

Saw this really cute video on howdini.com and decided to make one of these cute cakes for a friend's son's birthday =)

Not wanting to use a ready-cake mix from betty crockers meant i'd have to search for my own cake base to use. I decided to try out with the velvety chocolate cake i used (for the handbag cake and valentine's day cake) but realised it is really really soft despite me freezing and chilling it! I'd probably would use a pound cake in future but for now, i'm running out of time to search for a good pound cake recipe, so i'd still stick to the velvety chocolate cake.

I'm not very pleased with the outcome although my brother could immediately tell it IS a dinosaur, but it looks nothing like the one in the video. The frosting was too thick! and the shape was lost (due to the super thick frosting) Seems like i have to learn to work faster and more accurately. It did cross my mind to use fondant instead cos it guarentees a smooth finish, but no one really likes eating fondant right?

My frosting skills are REALLY horrible and the very soft cake doesnt help =( Seem like i really have to work on it. Hopefully all turns out well when i have to make the real cake *cross fingers*


*I used 6" cakes for practice purposes and have reduced the template sizes respectively. Should you want a copy of the reduced template size, just email me @ lovingbaking@gmail.com. The original copy is meant for a 9" cake =)

9 layer steamed kueh

I was really intrigued by the colourful layers of this kueh and still am, that I decided to try it out after seeing the recipe on bakingmum and Florence's blog.

I think this kueh is easily a favourite for many kids and adults today! And I'm sure it evokes many memories of peeling off layer by layer while savouring this pretty, yummy kueh!

I had 2 packets of tapioca flour that I haven't used since cny and since this recipe uses tapioca flour, it gave me more reason to try it out. With really really simple ingredients and method (minus the laborious steaming layer by layer) I felt complied to try it =p

I used whatever colouring i had at hand and had 9 layers exactly. I used 1 cup for each layer but 1 layer ended up exceptionally thin. I'd probably used a little less than 1 cup in future to ensure i get 9 even layers. OR, i might even do more layers as i felt the layers were a little thicker than those sold outside.

So here it is for those itching to make some home-made nine-layered steamed kueh.

*use a plastic knife to cut them out to ensure nice, smooth cuts!

Thursday, March 5, 2009

chewy milk chocolate and macademia nut cookies

Apologies for the lack of pictures on this post, the cookies were gone before I could snap pictures of it. I finally finally managed to get some decent chewy cookies. yes! like the subway kind, in case you were wondering. I like these better because:

1. you can put anything you like in it. choc chips, nuts, raisins, whatever you like
2. they're much less sweeter than the subway ones. (well i find those at subway annoyingly sweet!!! it's not that they aren't nice, but you kinda have to stop after 1)

I'm not entitled to post the recipe here but to make some of these yummilicious cookies, why not sign up for Anna's cookies workshop today?

p.s.: in case you were wondering, nope! I'm not paid to advertise for Anna's classes. Just a personal recommendation =p

milk chocolate and chesnut mousse

Warning! This dessert is not for the faint-hearted.

A post that's a little outdated, but i'm posting it because of the gorgeous photo taken by K. I adapted this dessert from Tartelette's blog while i was asked to prepare dessert for a gathering at a friend's place.

Both happy and regretful that i tried making this. Happy because I gave it a shot, regret because I didn't "test" it out prior to the real thing, so..it was a little substandard in my opinion and im pretty much unhappy with the outcome.

Well, apart from it looking real pretty, it tasted pretty good too, just that in such tall glasses, you'd die of sugar AND chocolate overdose. (each glass measures 125ml). The chestnut mousse was pretty sweet which was counter-balanced by the plain diary whipped cream. The ganache was a tad too hard and not very smooth that made it a little ..weird? the chocolate mousse was alright, but a little bitter, especially when eaten with the chesnut mousse (which was sweet remember?)

I would definitely try making this again, sometime somehow, i don't know when. Would play around with the choc:cream proportions for the ganache, so it'd stay softer and smoother. Probably add more chesnut mousse for the chesnut taste to come through more than the chocolate..but overall, I still like it alright. oh! oh! how can i forget this, make them in smaller cups!!

recipe here
Related Posts with Thumbnails